Create and Define a Workflow with the Canvas
3 min
To create a Workflow with the Canvas:
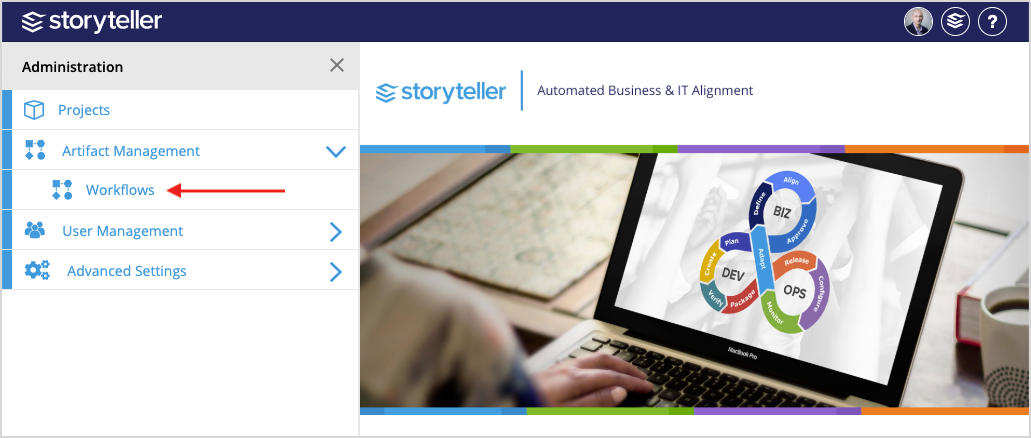
- In the Administration Portal, click the Artifact Management dropdown and selectWorkflows.
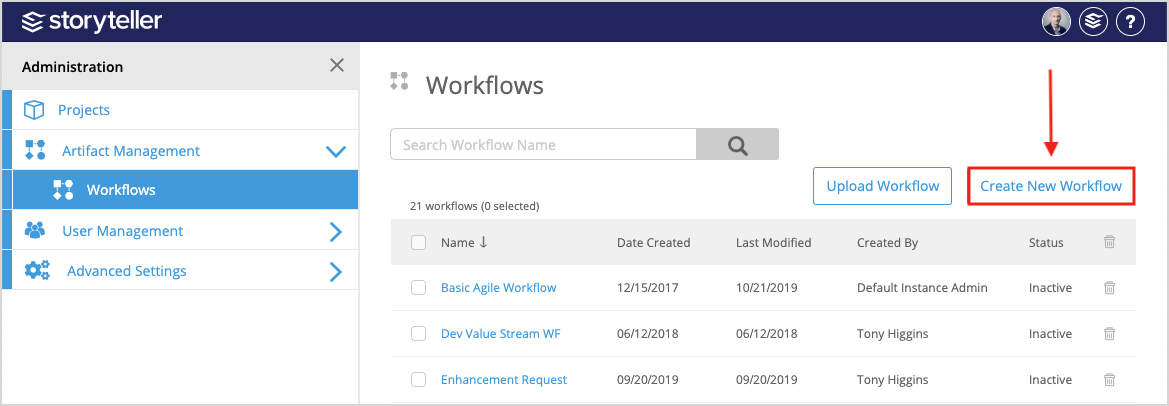
- Click Create New Workflow.
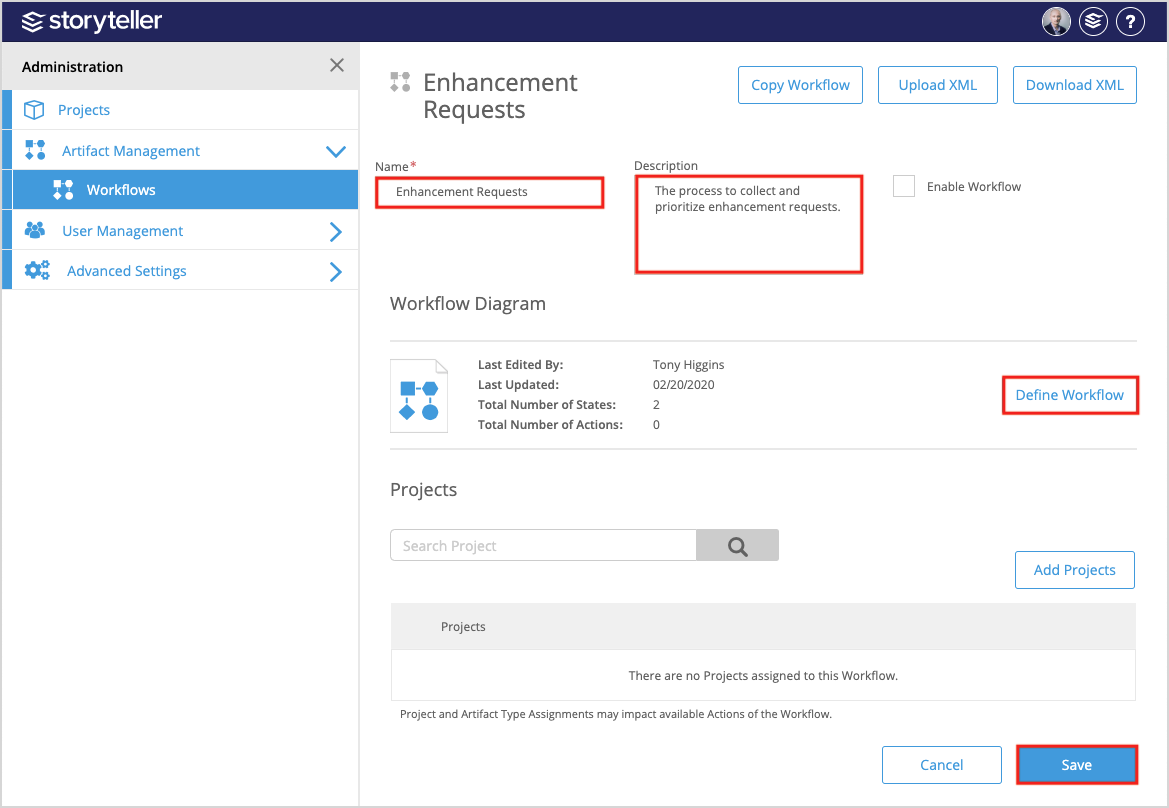
- Enter a name and description for the workflow in the corresponding fields available and click Save.
- Click Define Workflow to visually edit the workflow in the Canvas.
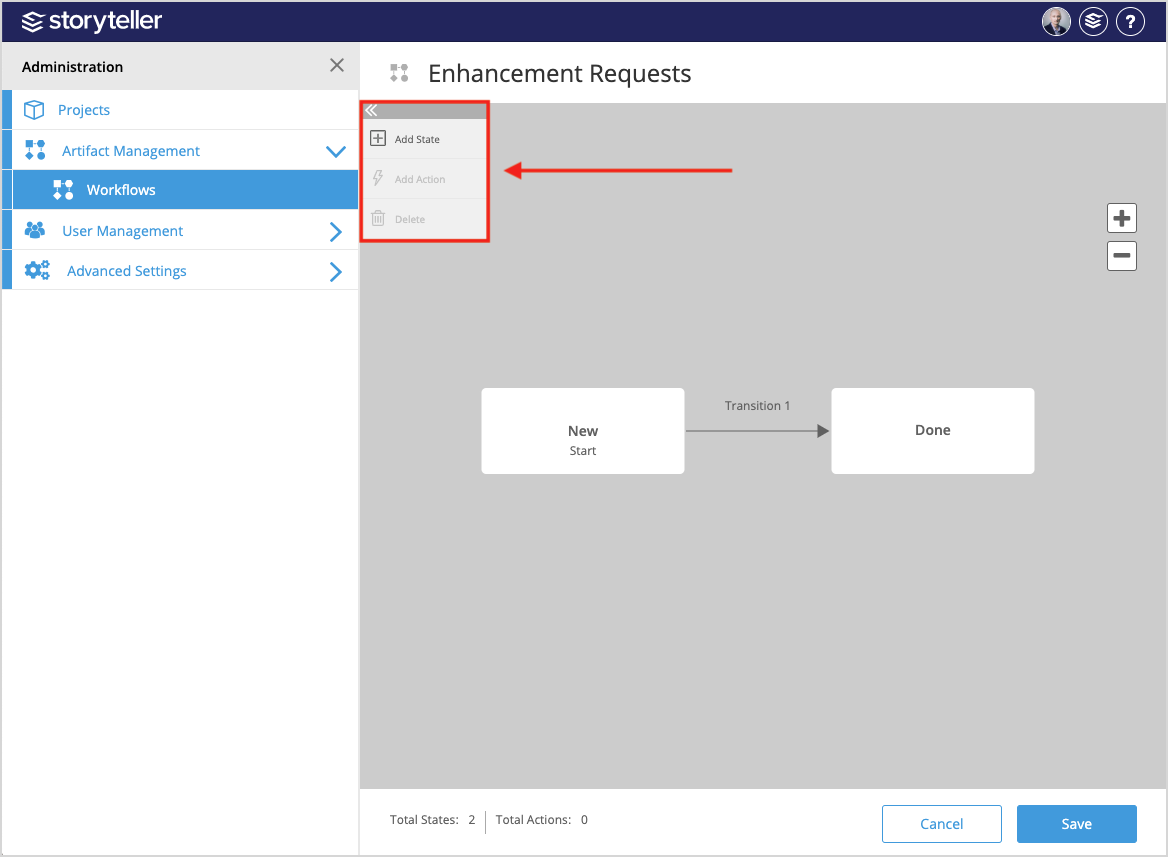
- Add States and Actions by clicking each respectively in the toolbar, and then clicking the Canvas where you want the State or Action to be placed. You can also drag States around the Canvas to rearrange the Workflow's representation and visually define it.
- To edit the names of States and Actions, double-click them and make your modifications as necessary.
- To create and edit transitions:
- Hover over a State to display its incoming/outgoing points.
- Create a new Transition by clicking a Transition point on the originating State; hold and drag to the destination State.
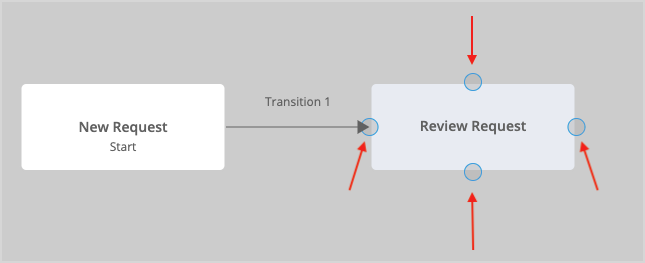
- Rename Transitions by double-clicking them and making your modifications.
- Rearrange Transitions by clicking and holding one of its endpoints, and dragging it to a new originating or destination State.
- Click Save to save your Workflow.
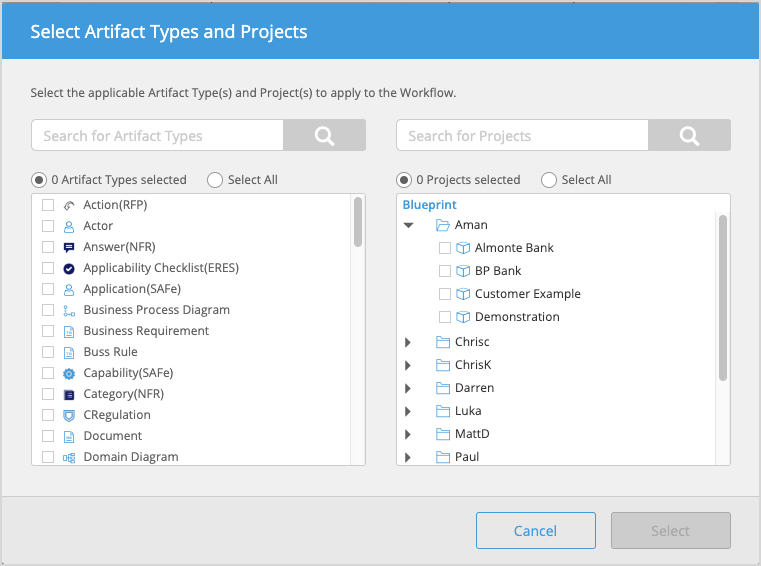
- To assign projects to the Workflow, click Add Projects and complete the following in the Select Artifact Types and Projects modal.
- In the Search for and select the artifacts in your instance that the Workflow should apply to.
- Search for and select the projects you want the Workflow to apply to.
- Click Select.
- To enable the Workflow, select the Enable Workflow checkbox.