Add Tags with the Tag Builder
The Tag Builder allows you to create a table from scratch.
Step 1 - Create a Table in Word
Before you can begin placing tags in the template, you need to know where they will go. As in the Add Tags with the Data Bin, you will create a table of employees. This one will have columns for the employee ID, the employee last name, the employee first name, and an additional column, job title.
Use Word's standard table tools to create a 4 by 2 table:
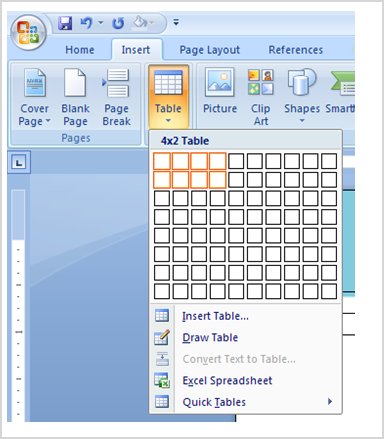
This size is chosen because it gives you one column for each data category. In the first row, place the data titles and in the second, place the tags. You do not need to know how many rows of data will be output when you run the report; AutoTag takes care of expanding that for you automatically.
In the table's first row enter the column headings, and then format the table using Word's commands:
Employee ID | Last Name | First Name | Title |
|---|---|---|---|
| | | |
Step 2 - Open the Tag Builder
First select the Blueprint tab on your window, under the “Tags” section there is a small arrow in the lower right corner of the ribbon group that will lead you to the tag builder illustrated below.
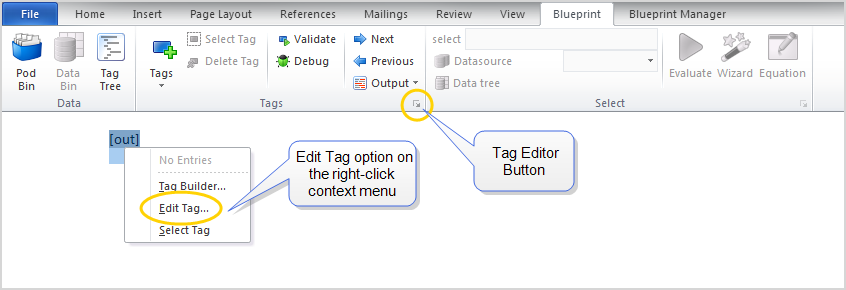
The Tag Builder is displayed.
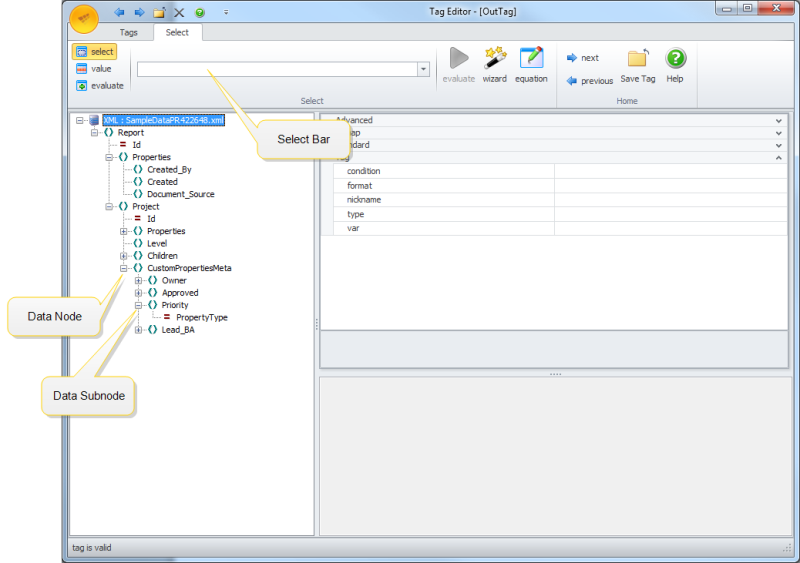
Step 3 - Create a Tag
In the Tag Editor, click the Tags tab and then select the <ForEach> Tag icon:

Step 4 - Set the Tag's Properties
Click the Select tab located to the right of the Tags tab. Here is where you will set the characteristics of the tag.
Select what data will be called upon by the <ForEach> tag. Since you will be creating a table of data from subgroups of the Employees data group, that's the group you want to loop through. Click the Employees data group in the Data Source pane, and drag and drop that group into the Select Bar.
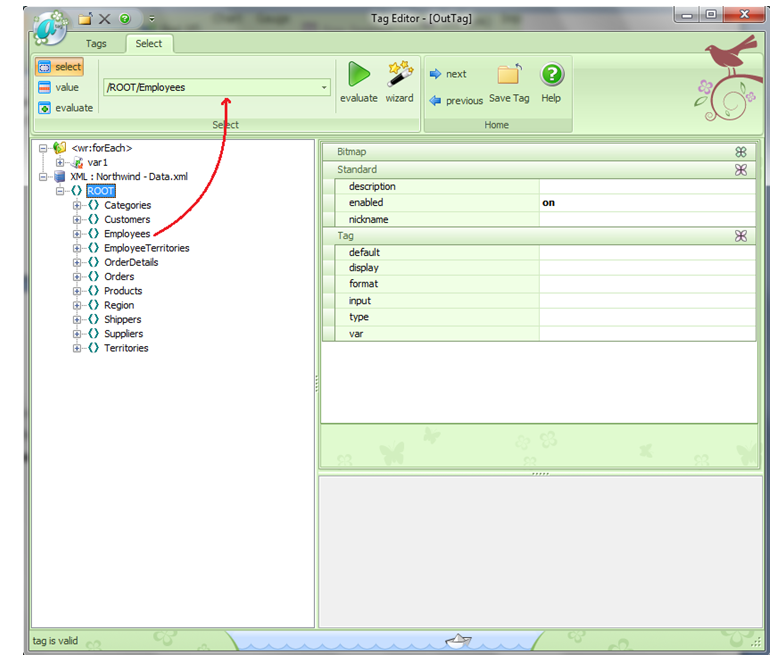
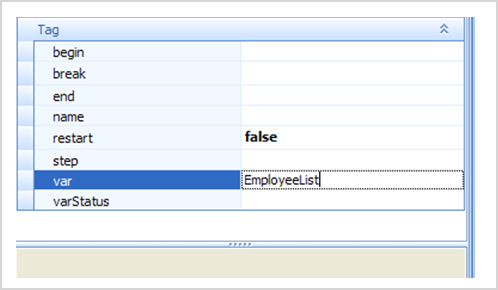
Second, name the <ForEach>tag, because if you don't, you cannot save it. Call this tag "EmployeeList." In the Attributes pane, click the Var text box, and enter the desired name (EmployeeList) in the text box:
Step 5 - Evaluate the Data
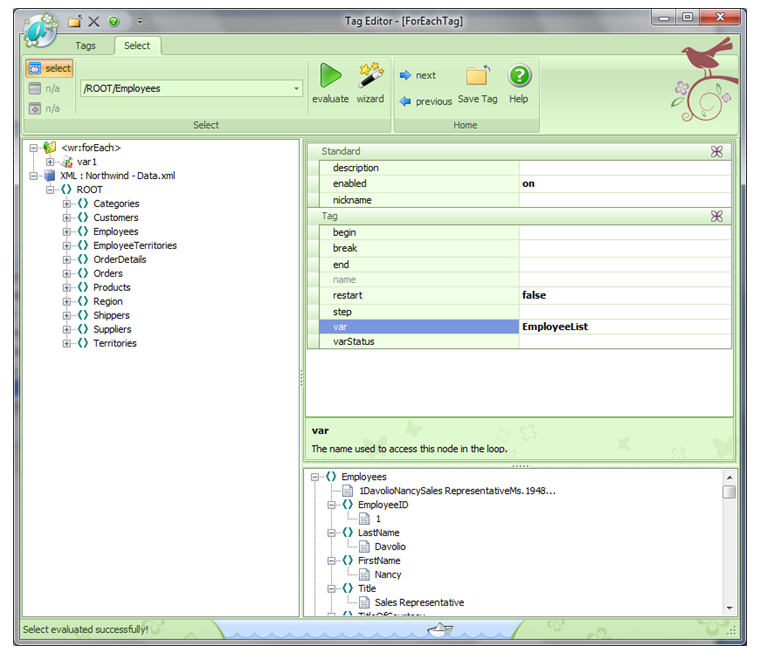
Next, ensure that you've chosen the correct set of data to work with. Click the Evaluate button. In the Evaluate Output pane, you see all the data in the group:
Step 6 - Save the Tag
Click the Save Tag icon. This closes the Tag Editor and places our first <ForEach> tag in the table:
Employee ID | Last Name | First Name | Title |
|---|---|---|---|
<Employees> | | | |
Step 7 - Create an <out> Tag
Now it's time to place data subgroups into the individual cells. Click in the ID cell after the <ForEach> tag, and click the Tag Builder icon. Follow the same general procedure as you did with the <ForEach> tag, with a few changes:
Click the Tags tab and click the <Out> Tag icon.
The <out> tag is the default tag type, so typically this is already done for you
Click the Select tab.
In the Data Source pane, click the + sign next to the <ForEach> tag name that you created in step four – in this case, EmployeeList – to expand it.
Drag the EmployeeID data subgroup from the EmployeeList into the Select Bar.
Be sure to drag and drop the correct EmployeeID data subgroup, as there are two listed in the Data Source Pane. Drag and drop the data subgroup from the EmployeeList, not from the main data source listed below it.
In the Attributes pane, type a descriptive name (such as "ID") in the Var text box.
Optional step: In Nickname text box in the Attributes pane, type the name of the tag as you would like it to appear in the template. If you do not enter a nickname, AutoTag assigns a default name based on the information in the Select Bar. If you do enter a nickname, we strongly recommend you include angle brackets around the text, so that anyone viewing the template can tell at a glance what is a tag and what is simply text.
Evaluate the data by clicking the Evaluate button.
Save the tag.
Step 8 - Create More Tags
Using the same procedures that you followed in step seven, create <out> tags for the three remaining cells.
Step 9 - Close the Loop
Now that we have all our tags placed in the table, you must close the <ForEach> loop.
Click the template just after the table and click the Tag Builder icon.
Click the Tags tab, and click the <End ForEach> Tag icon.
Click the Save Tag icon.
Your template now has all the necessary tags in place:
Employee ID | Last Name | First Name | Title |
|---|---|---|---|
<Employees><EmployeeID> | <LastName> | <FirstName> | <Title> |
:forEach>
Step 10 - Save and Run the Report
Save your document template using Word's Save command. Then, from the AutoTag Run Report menu, click the desired report format icon.